


Table of Contents
ToggleBathroom renovations in Richmond are becoming less of a luxury and more of a smart investment for homeowners. Whether you’re dealing with a 1950s pedestal sink and original tile or simply want a refresh, understanding the process saves time, money, and headaches. Richmond’s climate, humid summers and mild winters, creates specific challenges for bathroom materials and moisture control. This guide walks you through planning, design choices, materials, hiring contractors, and DIY-friendly updates so you can tackle your bathroom renovation in Richmond with confidence and realistic expectations.
Key Takeaways
- A bathroom renovation in Richmond typically ranges from $8,000 to $25,000+, with cosmetic updates costing $8,000–$12,000 and full renovations exceeding $20,000, making a 10–15% contingency buffer essential.
- Richmond’s humid climate demands moisture-resistant materials like porcelain tile, quartz countertops, and engineered wood vanities to prevent water damage and mold in your bathroom renovation project.
- Hiring licensed contractors with 5+ years of bathroom-specific experience and verified insurance is critical—the cheapest bid often hides cut corners, so compare detailed written quotes from at least three professionals.
- Mid-range bathroom renovations typically take 4–6 weeks, with full gut renovations stretching 8–12 weeks, but Richmond’s peak season (spring through fall) extends lead times and requires upfront communication about contingencies.
- DIY-friendly updates like painting, hardware swaps, re-caulking, and grout cleaning can refresh your space affordably, but plumbing, electrical work, and tile installation require licensed professionals to meet Virginia building codes.
- Modern bathroom designs in Richmond favor warm neutral tones, layered lighting (ambient, task, and accent), large format tiles, and walk-in showers that maximize space and appeal to aging-in-place considerations.
Planning Your Bathroom Renovation Project
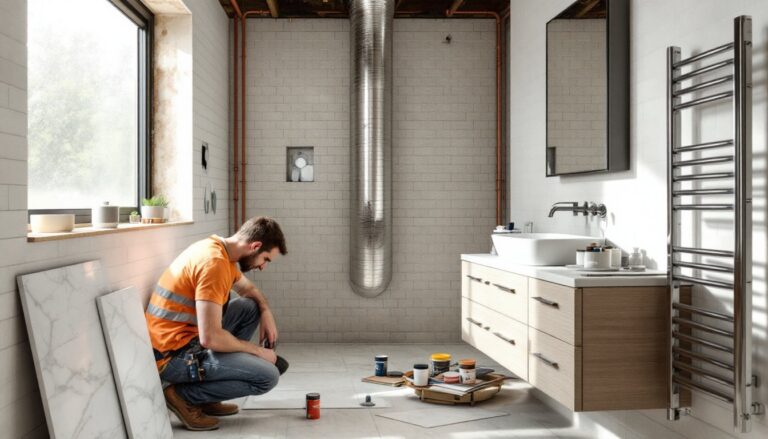
Before ordering tile or scheduling contractor calls, define what you actually want. Are you refreshing fixtures and flooring, or gutting the space for a complete overhaul? Small cosmetic updates (new vanity, paint, hardware) typically run 1–3 weeks. Full renovations involving plumbing relocation, electrical upgrades, or structural changes stretch to 4–8 weeks. Start by photographing your current bathroom and listing pain points: poor lighting, cracked grout, storage issues, or a dysfunctional layout.
Measure everything. Write down the room’s exact dimensions, ceiling height, window placement, and door swing direction. Note where plumbing stacks run and identify load-bearing walls if you’re considering opening up space. Take photos of water stains, mold, or damage behind walls and under the vanity, these hidden issues often inflate timelines and costs.
Research Richmond-specific building codes. Virginia’s residential code requires bathrooms to have a minimum of 5 square feet of clear floor space, adequate ventilation (exhaust fans must vent to the exterior, not an attic), and GFCI-protected outlets within 6 feet of a sink. Permits are mandatory for any work involving structural changes, plumbing, or electrical work, attempting to skirt this invites code violations and inspection failures later.
Setting a Realistic Budget for Richmond Homes
Bathroom budgets in the Richmond area typically range from $8,000 to $25,000+ depending on scope. A basic cosmetic refresh (new vanity, paint, fixtures, and simple tile) runs $8,000–$12,000. Mid-range renovations with layout changes and quality finishes climb to $15,000–$20,000. High-end projects with custom cabinetry, heated floors, or steam showers exceed $25,000. Use a Home Renovation Budget Template to track all line items, labor, materials, permits, and contingency.
Build in a 10–15% contingency buffer. Unexpected water damage, outdated wiring, or hidden structural issues consume budgets quickly. Richmond’s older housing stock makes this especially important. Get written quotes from at least three contractors before committing. Compare apples to apples: confirm whether quotes include permits, dumpsters, and cleanup.
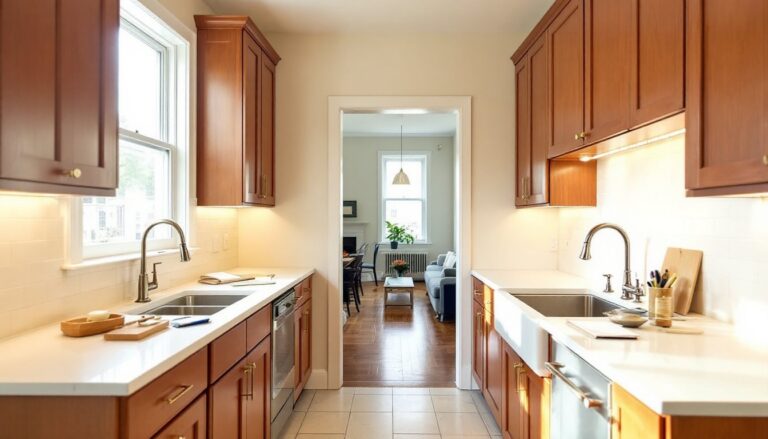
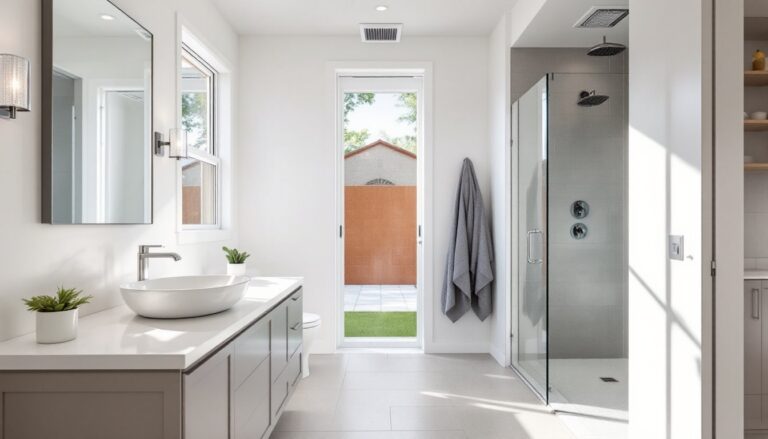
Popular Bathroom Styles and Design Trends
Richmond homeowners are gravitating toward timeless styles rather than ultra-trendy designs that age quickly. Modern farmhouse, combining clean lines with shiplap or weathered wood accents, remains popular. Spa-like aesthetics with neutral tones, soft lighting, and natural materials appeal to those prioritizing relaxation. Contemporary minimalism with floating vanities, large format tiles, and integrated storage keeps spaces functional and clutter-free.
Color trends are shifting away from all-white toward warm neutrals: soft grays, warm beige, and gentle greens. Accent walls or tile work in deeper tones (charcoal, navy, or muted green) add personality without overwhelming. Marble and marble-look quartz remain staples, though porcelain tile that mimics natural stone offers durability at lower cost.
Lighting design has become critical. A single overhead fixture is outdated. Layer ambient lighting (recessed or ceiling fixtures), task lighting (vanity sconces on both sides of the mirror), and accent lighting (LED strips or pendant lights). Brushed nickel and matte black finishes are replacing shiny chrome. Large format mirrors (48″ wide or wider) make spaces feel larger and reflect light effectively.
Walk-in showers without curbs are highly desired but require proper slope and drainage planning. If your bathroom layout allows, a walk-in shower with a handheld showerhead and seat appeals to aging-in-place thinking. Freestanding soaking tubs remain luxurious but require space and plumbing: corner placement saves square footage.
Essential Fixtures and Materials to Consider
Vanities come in three styles: single-sink (24″–36″ wide), double-sink (48″–60″ wide), and floating designs. Floating vanities save floor space and allow easier cleaning. Depth is usually 21″ or 22.5″, confirm your bathroom allows this before ordering. Solid wood vanities look nicer but require careful sealing in humid bathrooms: plywood with veneer or moisture-resistant engineered wood is practical.
Sinks split into three main types. Undermount sinks appear seamless with countertops and are easy to clean. Drop-in sinks sit on the counter rim and are easier to replace later. Wall-mounted sinks maximize floor space in small bathrooms. Ceramic, porcelain, and cast iron resist staining and chip less than acrylic.
Countertops must handle moisture. Quartz is non-porous, durable, and requires minimal maintenance, expect $60–$150 per square foot installed. Solid surface materials like Corian are seamless and repairable but cost $50–$100 per square foot. Granite looks elegant but is porous and requires sealing every 1–3 years. Laminate is budget-friendly ($30–$50 per square foot) but less durable in wet areas.
Flooring requires slip resistance and moisture tolerance. Porcelain tile (12″×12″ or larger formats) is durable, affordable ($3–$15 per square foot), and available in wood-look or stone-look finishes. Natural stone looks stunning but needs sealing and is slippery when wet. Luxury vinyl plank (LVP) mimics wood, costs $2–$8 per square foot, and handles moisture well, though quality varies. Never use laminate or standard hardwood: moisture will destroy them.
Tile for walls comes in countless options. Subway tiles (3″×6″) remain classic and affordable. Large format tiles (12″×24″ or bigger) reduce grout lines and visual clutter. Cement tiles offer personality with patterns but require sealing. Budget $5–$20 per square foot for materials, plus labor. Grout color matters, dark grout hides stains: light grout shows them.
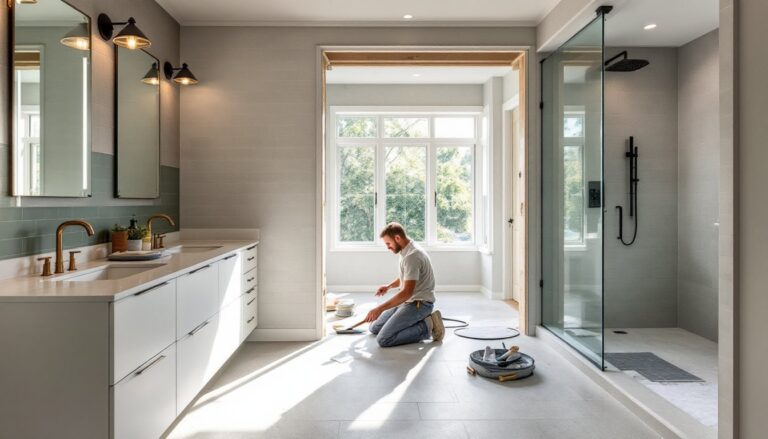
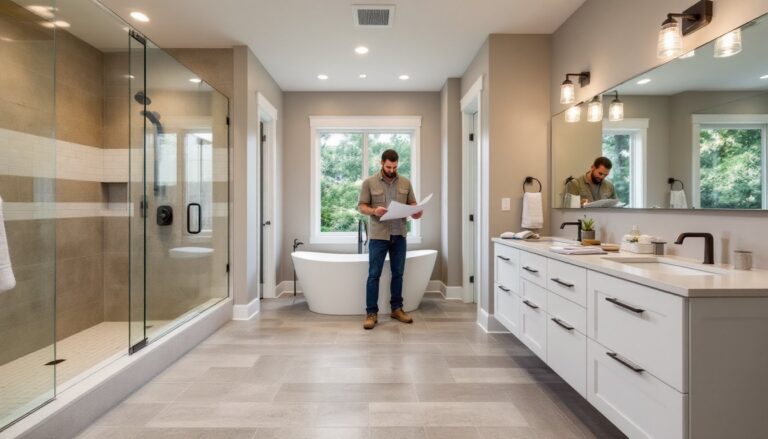
Finding Qualified Contractors in the Richmond Area
Start your search through referrals and online platforms. Ask neighbors or friends about their recent renovation experiences. Check HomeAdvisor and local licensing boards for contractor credentials. Virginia requires bathroom remodelers to hold a Contractor’s License if the project exceeds a certain cost threshold, confirm this with your local building department.
Narrow candidates to those with 5+ years of bathroom-specific experience. A kitchen remodeler isn’t necessarily skilled in bathrooms: the trades overlap but the expertise differs. Request references and call them, ask about timeline adherence, cleanliness on-site, and how problems were handled. Review online ratings, but read negative reviews carefully: sometimes they reveal legitimate red flags (uncompleted work, budget overruns, poor communication).
Get detailed written quotes from at least three contractors. A quote should itemize labor, materials, permits, and timeline. Vague estimates are a warning sign. The cheapest bid isn’t always best: suspiciously low quotes often hide cut corners or result in change orders later. Compare similar scopes closely. Ask each contractor how they handle unexpected issues, water damage, plumbing surprises, or hidden structural problems. Who absorbs the cost? How much notice before adding charges?
Verify licensing and insurance. Call Virginia’s Department of Professional and Occupational Regulation (DPOR) to check a contractor’s license status. Confirm they carry general liability and workers’ compensation insurance, if a worker is injured on-site and they’re uninsured, you could be liable. Request copies of insurance certificates.
For Richmond-specific options, top-rated kitchen and bathroom remodelers in Richmond include firms with proven track records in the local market. This resource lists remodelers with real reviews and ratings, making it easier to vet candidates quickly. Meet in-person with your top two choices. Trust your instincts: you’ll spend weeks with this person, communication and reliability matter as much as skill.
DIY-Friendly Updates You Can Handle Yourself
Not every bathroom project requires a contractor. Painting, hardware swaps, and simple fixture replacements are realistic DIY tasks. Prep is everything, sand glossy finishes, prime bare patches, and use quality paint (semi-gloss or satin in bathrooms resists moisture better than flat). Two coats and proper ventilation ensure durability.
Replacing cabinet hardware is free money. Swap out old pulls and knobs for brushed nickel, matte black, or brass, instant refresh for $50–$200. No tools beyond a screwdriver needed. Similarly, updating light fixtures (vanity sconces, exhaust fans with LED lights) is straightforward if you’re comfortable shutting off power at the breaker and basic wiring. Always confirm power is off before touching anything.
Re-caulking around the tub or shower is simple and transforms the space. Remove old, cracked caulk with a caulk removal tool (or a utility knife carefully). Clean the joint thoroughly with a mildew-killing product, dry completely, and apply 100% silicone caulk (not acrylic, it doesn’t last in wet areas). Use painter’s tape on both sides for clean edges.
Grout cleaning and sealing on existing tile is doable without special skills. Use a grout brush or old toothbrush with a diluted bleach solution or commercial grout cleaner. For porous grout, apply a penetrating sealer afterward, this prevents staining and mildew. Skip it at your peril.
Where to draw the line: plumbing beyond disconnecting/reconnecting a fixture, electrical work beyond simple outlet swaps, and anything structural needs a licensed professional. Tile removal and replacement require specialty tools and skill: broken tiles sink into walls or create water damage. If you’re confident and handy, learn from detailed tutorials, but permits and inspections still apply to structural work, even if you’re doing labor yourself.
Timeline and Expectations for Your Project
Timelines depend heavily on scope and contractor availability. Small cosmetic projects, paint, fixtures, hardware, typically finish in 2–3 weeks. Mid-range renovations with new vanity, flooring, tile work, and minor plumbing adjustments run 4–6 weeks. Full gut renovations with structural changes, new plumbing runs, electrical work, and custom tile patterns easily stretch 8–12 weeks. Richmond contractors are booked, especially spring through fall: expect longer lead times in peak season.
A realistic week-by-week breakdown for a mid-range project: week one covers demolition and prep (removing fixtures, old flooring, wall removal if planned). Weeks two to three involve rough-in work, plumbing lines, vent stacks, electrical circuits. Week four brings drywall, waterproofing, and tile installation. Week five includes grouting, final fixtures, and paint. Week six handles final inspections and punch-list items. Weather, material delays, and discoveries shift dates: discuss contingencies upfront.
Expect disruption. Even a “small” project means no shower for days. Dust seeps into adjacent rooms even though plastic sheeting. Contractors start early (7–8 a.m.). Noise is significant, tile saws, nail guns, demolition hammers. If noise-sensitive or work-from-home, discuss start times and quiet periods. Richmond’s humidity complicates drying times for paint, caulk, and grout: contractors may work slower in peak summer humidity than expected.
Building inspections are mandatory at rough-in (plumbing and electrical) and final completion. Plan for 2–3 days between finish work and final inspection. If the inspector finds code violations, corrections delay your timeline further. Budget psychologically for minor frustrations, material shipment delays, worker illness, or contractor juggling multiple jobs sometimes slow progress. Maintain communication: weekly check-ins reduce surprises. A home renovation loan can ease financial strain if timelines extend, allowing you to weather delays without household stress.