


Table of Contents
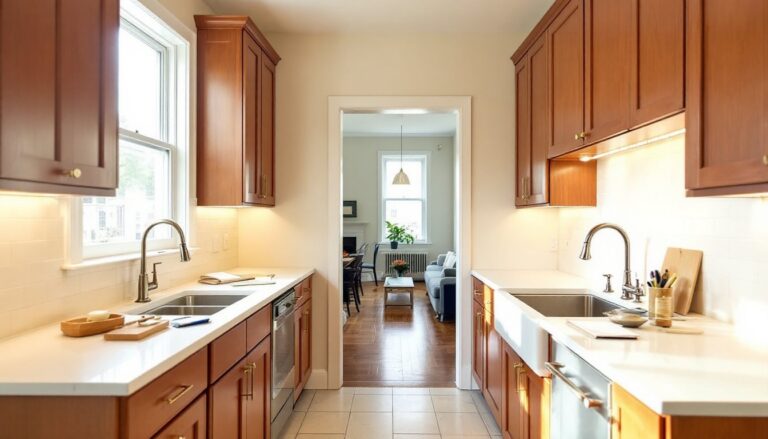
ToggleSingapore homes often feature compact kitchens that demand smart planning and intentional design choices. Whether you’re refreshing outdated cabinetry, improving workflow, or tackling a full gut renovation, understanding the unique constraints of Singapore’s urban living space is essential. This guide walks you through the practical steps of planning a kitchen renovation in Singapore, from budgeting and space optimization to material selection and DIY-friendly projects you can tackle yourself. We’ll skip the lifestyle fluff and focus on what actually works in tight spaces, humid climates, and realistic budgets.
Key Takeaways
- A kitchen renovation in Singapore requires understanding BCA permit requirements for structural changes, plumbing, and electrical work, while cosmetic upgrades like paint and hardware typically don’t need approval.
- Budget-friendly upgrades like cabinet painting (SGD $300–800), new lighting (SGD $150–500), and backsplash tiles (SGD $500–1500) deliver maximum impact without a full renovation.
- Singapore kitchens demand moisture-resistant materials: choose quartz countertops, porcelain tiles, and luxury vinyl plank flooring over materials vulnerable to tropical humidity and heat.
- Maximize compact kitchen space through vertical storage, wall-mounted shelving, corner pull-out mechanisms, and efficient work triangles rather than space-consuming islands.
- Confident DIYers can tackle cabinet painting, backsplash tiling, shelving installation, and wall painting, but must hire licensed professionals for structural changes, plumbing, electrical work, and countertop fabrication.
- A straightforward kitchen refresh typically takes 8–12 weeks, while layout overhauls with plumbing or structural work can extend to 4–6 months—plan accordingly before starting.
Planning Your Kitchen Renovation: Key Considerations for Singapore Homes
Before you pick a paint color or measure for new cabinets, nail down the fundamentals. Singapore’s Building and Construction Authority (BCA) requires permits for structural changes, moving walls, adding plumbing, or relocating electrical points all trigger permitting. Cosmetic upgrades like paint, hardware, or countertops typically don’t, but check with your local authority to confirm.
Start by defining your scope: Are you refreshing finishes, reconfiguring the layout, or both? Layout changes eat time and money fast. A straightforward refresh (new counters, cabinets, appliances, lighting) usually runs 8–12 weeks. A layout overhaul with structural or plumbing work can stretch to 4–6 months. Document your kitchen’s current state with photos and measurements, exact dimensions of walls, windows, doors, and existing appliances matter for planning. Factor in the humidity and heat typical of Singapore: materials and appliances must handle tropical moisture without rusting or warping. A kitchen renovation budget template helps track costs across materials, labor, permits, and contingencies.
Budget-Friendly Kitchen Upgrades That Deliver Maximum Impact
You don’t need to rip out everything to see dramatic results. Small, strategic upgrades can refresh your kitchen for a fraction of a full renovation‘s cost.
Painting cabinetry is the quickest win. A fresh primer and two coats of quality kitchen-grade paint (satin or semi-gloss finish resists moisture) transforms tired wood or laminate for SGD $300–800 in materials. Swap cabinet hardware, handles and knobs, to update the look without structural work: this costs SGD $100–400 and takes an afternoon. New lighting is equally impactful: LED under-cabinet strips improve visibility and add contemporary appeal for SGD $150–500. Countertop resurfacing with laminate or engineered quartz costs less than full replacement and lasts 10–15 years. Backsplash tiles in a modern pattern (subway, geometric, or solid color) cost SGD $500–1500 and anchor a refreshed aesthetic. If your appliances are dated but functional, focus upgrades on high-visibility items like range hoods and faucets. Many homeowners find that upgrading flooring to ceramic or vinyl plank (easier to maintain than tile grout in humid climates) delivers perceived value without full-scale demolition. A home renovation budget template helps you prioritize these quick wins against your available funds.
Space Optimization Strategies for Compact Singapore Kitchens
Singapore kitchens are seldom spacious, so every inch counts. Before committing to a new layout, ask yourself: Does the current configuration work, or are you fighting it daily? Sometimes moving the stove, sink, or fridge opens surprising workflow gains. If you’re reconfiguring, ensure the work triangle (stove, sink, fridge) flows logically, ideally between 4 and 9 meters of total distance for efficiency. Avoid dead zones or bottlenecks where appliance doors block passage.
Vertical storage is non-negotiable in compact kitchens. Wall-mounted shelving, pegboard, or tall cabinetry that extends to the ceiling maximizes storage without eating floor space. Corner cabinets equipped with pull-out mechanisms (lazy Susans or sliding trays) recover wasted corner real estate. A kitchen island sounds tempting but often shrinks usable space in tight quarters: consider a slimline rolling cart or fold-down counter instead for flexibility without permanent footprint. Drawer dividers, pull-out spice racks, and under-sink organizers don’t cost much but dramatically improve usability. Countertop clutter steals visual space, so plan storage that matches your cooking habits, if you use your food processor daily, carve out an accessible spot rather than burying it in a cabinet.
Smart Storage Solutions and Layout Ideas
Start by auditing what you actually store. Many homeowners keep duplicates, expired items, or gadgets they’ve never used. A ruthless purge immediately frees up cabinet and shelf space. Next, categorize: daily-use items (cooking utensils, everyday dishes) belong within arm’s reach of the stove or sink. Seasonal or occasional items can live higher up or deeper in cabinets. Lighting matters here too, under-cabinet LED strips let you see into deep cabinets, reducing the “out of sight, forgotten” problem. Transparent containers for pantry staples (rice, pasta, flour) take up the same space as opaque ones but make inventory management instant. Open shelving above counters creates an airy feel and works well for attractive items (cookbooks, ceramics, quality glassware) but requires disciplined styling: if your kitchen leans utilitarian, skip it. Door-mounted racks and magnetic strips for knives and metal tools add storage without cabinetry. For narrow kitchens, single-column galley layouts often work better than island-centric designs: you’ll have a clear, unobstructed work area rather than a cramped space around a central piece.
Choosing Materials and Finishes for Durability and Style
Singapore’s humidity and heat test materials relentlessly. Cheap finishes bubble, warp, or rust within months. Invest strategically in durable, moisture-resistant options.
Cabinetry: Solid wood or engineered wood with high-quality lacquer or polyurethane finishes stands up best. Laminate or veneer is budget-friendly but vulnerable if edges aren’t sealed properly: ensure edge-banding is robust. Moisture-resistant medium-density fiberboard (MDF) with waterproof coatings is a middle ground.
Countertops: Quartz engineered stone is non-porous, stain-resistant, and handles moisture better than natural granite (which can etch in acidic spills). Laminate is affordable but prone to delamination in humid kitchens if not sealed at edges. Stainless steel is industrial and durable but shows fingerprints and noise. Concrete is trendy but requires sealing and maintenance. Solid surface materials like Corian offer seamless integration and easy repair.
Backsplash: Ceramic tile is budget-friendly and easy to clean. Porcelain is denser and more stain-resistant. Glass tiles add light and modern appeal but require grout sealing to prevent mold in humid climates. Stainless steel or solid surface are low-maintenance alternatives.
Flooring: Ceramic or porcelain tiles are durable and moisture-proof. Luxury vinyl plank (LVP) or vinyl tile mimics wood or stone, is softer underfoot, and handles humidity better than real hardwood. Ensure underlayment is moisture-resistant. Avoid solid hardwood: tropical humidity causes cupping and warping.
Hardware and fixtures: Choose stainless steel or coated finishes that resist corrosion. Brass and chrome degrade faster in humid environments. Test faucets for smooth operation and check that spray heads don’t jam. Quality matters here, a leaking faucet costs far more in water waste and repair than a premium unit upfront. Contractors and design platforms like Houzz showcase material combinations suited to Singapore climates: study completed kitchens in similar settings before specifying finishes.
DIY Kitchen Projects You Can Tackle Yourself
Not everything requires a contractor. These projects are achievable for confident DIYers with basic tools.
Cabinet Painting: Strip hardware, sand the surfaces, apply primer, then two coats of semi-gloss kitchen paint. Use a paintbrush or foam roller for smooth finishes without brush marks. Ventilate well, open windows and use a box fan to move air. Drying time between coats is critical: don’t rush. Takes 3–5 days total, including drying.
Backsplash Tile: Cut subway tiles with a wet saw, apply mortar with a notched trowel, and grout after 24 hours. Rent a wet saw (SGD $30–50 per day) rather than buying unless you plan future projects. Wear eye protection and a dust mask: tile dust is no joke. This project rewards patience, rushed grouting shows. Budget 2–3 days.
Shelving Installation: Locate studs in the wall with a stud finder. Drill pilot holes, then mount brackets securely with appropriate anchors (toggle bolts if not hitting studs). Use a level to ensure shelves are truly horizontal. Install shelves one at a time and test load capacity before fully loading. A few hours per shelf.
Hardware and Faucet Swaps: Replacing cabinet handles is straightforward, unscrew old hardware, measure holes, and install new handles. Faucet replacement is trickier if the footprint doesn’t match your existing holes: if holes align, shut off water, disconnect supply lines, unscrew the old faucet, and install the new one. Have a bucket handy for residual water. If holes don’t match, you’ll need to drill new ones or fill and re-drill, this moves into intermediate territory.
Painting Walls and Trim: Prime first, then paint with kitchen-grade paint (satin or semi-gloss resists moisture and cleans up easily). Use painters’ tape to protect trim and appliances. Two coats is standard. A gallon covers roughly 350–400 square feet: calculate your square footage to avoid underbuying. Takes 2–3 days with drying time.
When to Call a Pro: Structural changes, plumbing relocation, electrical work, gas line modifications, and countertop fabrication (especially quartz or concrete) require licensed professionals. Permits are non-negotiable for these. A contractor matching service like HomeAdvisor streamlines finding vetted professionals in Singapore. Layout reconfiguration also benefits from a designer’s eye, even if you’re doing some work yourself. Building and Construction Authority (BCA) requirements vary, so clarify permit scope early.
Conclusion
A kitchen renovation in Singapore doesn’t have to drain savings or paralyze your household for months. Start with a clear scope, prioritize high-impact upgrades, and match materials to your tropical climate. Tackle what you can confidently manage yourself, and bring in professionals for structural, plumbing, and electrical work. With thoughtful planning and realistic expectations, you’ll have a kitchen that’s both functional and refreshed, tailored to how you actually live and cook.