

Table of Contents
ToggleA tired, leaky shower doesn’t just drag down your bathroom’s look, it wastes water, invites mold, and turns a routine task into a frustration. Whether you’re eyeing a complete bathroom shower renovation or targeting a few smart upgrades, the good news is that modern materials and techniques have made the work more manageable (and less messy) than ever. This guide walks you through the entire process, from budget and design choices to material selection and the critical decision of whether to swing a hammer yourself or call in backup. We’ll skip the Pinterest fluff and focus on what actually works: honest timelines, real costs, specific product recommendations backed by reasoning, and clear guidance on where DIY ends and professional expertise begins.
Key Takeaways
- A bathroom shower renovation budget ranges from $3,000–$8,000 for cosmetic updates, $8,000–$15,000 for mid-range work, and $15,000–$30,000+ for full structural overhauls, with an additional 10–15% contingency for unexpected repairs.
- Porcelain tile outperforms ceramic in wet shower areas because it absorbs less water (under 0.5% versus 3–6% for ceramic) and lasts 25+ years, making it the most durable choice for shower walls and floors.
- Proper waterproofing and ventilation are critical: install a waterproof membrane at least 60 inches up from the floor, slope the shower pan ¼ inch per foot toward the drain, and use a dedicated exhaust fan rated for 100+ CFM to prevent mold and structural damage.
- DIY-friendly tasks include demolition and tile installation, but plumbing, electrical work, and shower pan waterproofing should be left to licensed professionals to avoid code violations, safety hazards, and costly water damage.
- Quality fixtures like pressure-balancing valves, brushed nickel or matte black finishes, and premium showerheads ($100–$200) provide better longevity and performance than budget alternatives that may fail within 3 years.
- Always pull permits for bathroom shower renovation projects that involve structural changes or utility rerouting, as unpermitted work can affect home appraisals and void insurance coverage.
Planning Your Shower Renovation: Budget and Design Essentials
Setting a Realistic Budget and Timeline
You’ve probably heard that bathroom renovations swallow budgets whole. They do, if you’re not intentional. Start by deciding what tier you’re playing in: a basic cosmetic refresh (new tile, paint, fixtures) runs $3,000–$8,000. A mid-range redo (demo, new walls, better fixtures) lands you at $8,000–$15,000. A full structural overhaul with plumbing and electrical changes? Plan for $15,000–$30,000+. These are national averages: your region, material choices, and any hidden damage discovered during demo will shift the needle.
Timeline matters just as much. A straightforward tile and fixture swap takes 2–3 weeks. If you’re rerouting plumbing, adding ventilation, or dealing with water damage behind walls, tack on another 1–2 weeks of investigation and repair. Tools like a Home Renovation Budget Template help you track materials, labor, and contingencies so nothing blindsides you halfway through. Always add 10–15% contingency for surprises: water damage, cracked studs, and code violations love hiding in old bathrooms.
Choosing a Design Style That Fits Your Home
Your shower’s style should complement your bathroom and home, not clash with it. Modern minimalist showers favor clean lines, neutral tiles (subway, large-format porcelain), matte black or brushed nickel fixtures, and open shelving or recessed niches for storage. Traditional designs lean on smaller tiles, decorative trim, oil-rubbed bronze hardware, and built-in soap shelves. Spa-style bathrooms emphasize natural stone, warm lighting, and rainfall showerheads.
Pick one direction and stick with it, mixing too many aesthetics reads as indecisive. Your tile choice anchors the whole look. Large-format tiles (24×24 inches or bigger) minimize grout lines and feel contemporary: smaller tiles (4×4 or subway 3×6) read classic or playful. Porcelain tile is harder and less porous than ceramic, making it better for wet areas prone to staining. Whatever you choose, confirm it meets your region’s slip resistance codes (most jurisdictions require a minimum coefficient of friction for shower floors).
Consider the showerhead style too. Rainfall heads feel luxe but use more water: water-saving heads meet EPA WaterSense standards without sacrificing pressure. Handheld options add flexibility for cleaning or bathing kids.
Materials and Finishes: What Works Best for Modern Showers
Tile isn’t your only option anymore, but it remains the most durable and versatile. Porcelain tile outperforms ceramic in wet zones because it’s fired at higher temperatures and absorbs less water (typically under 0.5% absorption vs. 3–6% for ceramic). Natural stone (marble, granite, slate) looks stunning but requires sealing every 1–3 years and demands careful maintenance. Luxury vinyl plank (LVP) and sheet vinyl have come a long way: waterproof engineered options now exist, though purists argue they don’t match tile’s longevity (25+ years vs. 10–20 for vinyl).
Walls are equally critical. A shower enclosure must shed water, not absorb it. Cement board, a gypsum-cement composite, was long the standard underlayment and still works fine when properly installed with thinset mortar. Newer alternatives like foam boards or waterproof drywall are lighter and faster to install: they’re acceptable in most jurisdictions but check your local code. The real waterproofing happens at the shower pan, the floor’s underlying layer. Cleft tile pans (traditional) require skilled installation but last decades. Pre-sloped acrylic or fiberglass pans are quicker and forgiving for DIYers, though they’re less durable long-term. A sloped floor directs water toward a drain: slope should be roughly ¼ inch per foot.
Fixtures, the showerhead, valve, and trim, are where you balance aesthetics, budget, and function. Pressure-balancing valves protect against sudden temperature swings (a safety essential with kids or elderly residents). Thermostatic valves maintain exact temperatures and cost more. Chrome fixtures shine but show water spots: brushed nickel, matte black, and oil-rubbed bronze hide spots better. Longevity is real here: a $40 discount showerhead may seize up in 3 years: a quality unit costs $100–$200 but lasts the life of the bathroom.
Sealants and grout hold everything together literally. Epoxy grout resists mold and staining far better than standard cement grout, though it’s harder to apply, many DIYers hire a pro for this step alone. Caulk (preferably 100% silicone, not latex) seals gaps between tile and fixtures: it’ll need reapplication every 3–5 years, which is normal maintenance.
Installation and Key Features to Consider
Waterproofing and Ventilation Fundamentals
Waterproofing is the difference between a shower that lasts 30 years and one that rots your home from the inside out. The International Residential Code (IRC) requires a waterproof membrane behind all shower walls extending at least 60 inches up from the floor (48 inches minimum in some cases: confirm your local code). Liquid membrane products, sheet membranes, or fabric-reinforced barriers all work if installed correctly. The catch? Improper sealing at corners, penetrations (fixtures, pipes), and transitions to adjacent walls is where leaks breed. This is a critical step to do right or hire out.
Floor waterproofing is equally non-negotiable. The shower pan liner, the hidden layer under your tile, is your last defense against water seeping into the subfloor and framing. Properly sloped and sealed, it directs every drop toward the drain. If you’re retrofitting an old shower or dealing with an irregular floor, this is where professionals earn their fee: a botched pan job costs thousands to fix later.
Ventilation prevents mold and extends your bathroom’s life. A dedicated exhaust fan pulling moisture out is mandatory, not optional. Size matters: calculate your bathroom’s square footage and choose a fan rated for continuous operation in wet zones. A 100 CFM (cubic feet per minute) minimum is standard: 150+ is better for larger bathrooms. Vent the fan outside (through a wall or roof), not into an attic, that just moves the moisture problem. Run the fan during and 20–30 minutes after every shower. Some code jurisdictions now require humidity sensors or timer controls: check yours before installing.
Air gaps around fixtures, where pipes or wires pass through walls, need backing and sealant. Expanding foam (if using a spray-in application) works, but caulk it after for a watertight seal. Corners and inside angles demand special attention: many people caulk them with standard caulk only to find mold blooming behind the walls months later. Quality sealant and proper curing time (24 hours minimum before water exposure) aren’t shortcuts to skip.
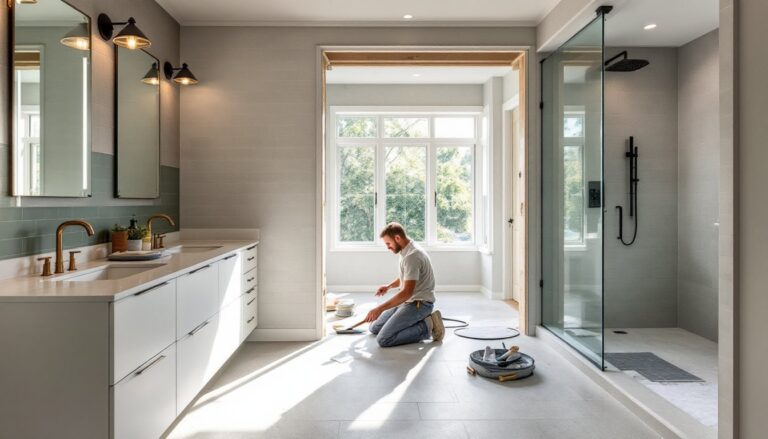
DIY vs. Hiring a Professional: Making the Right Choice
Honest truth: some shower work is DIY-friendly: some demands a license for good reason. Demolition and prep? You can handle that, grab a pry bar, shop vac, and dust mask. Ripping out an old shower is loud and dusty but not technically complex. Installing tile? If you’ve got patience and attention to detail, absolutely doable. Grout lines won’t be museum-perfect your first time, but functional and decent-looking tile work is within reach after a weekend of YouTubing and practice on scrap board.
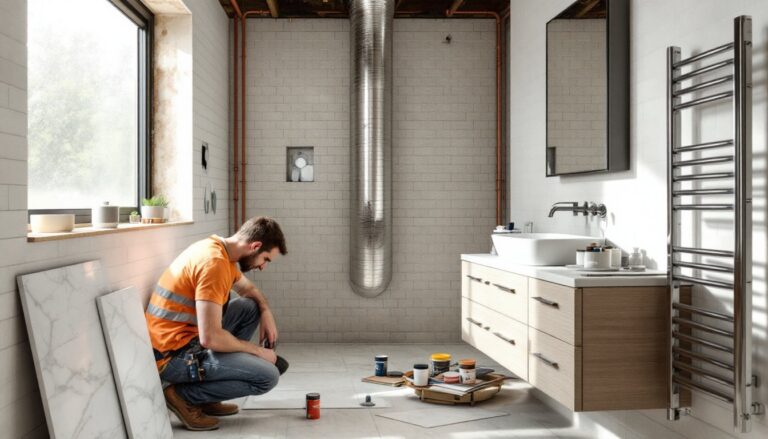
Stop here if we’re talking plumbing or electrical. Shower valves connect to your home’s water supply: an improper joint leaks, sometimes invisibly, until structural damage appears. Mixing valves, rough-in positioning, and pressure-balancing requirements vary by code and fixture type. Electrical work in wet zones has strict NEC (National Electrical Code) rules about GFCI protection and fixture placement. Getting these wrong isn’t a cosmetic oops: it’s a safety and code violation that’ll prevent you from selling your home and may void insurance.
Waterproofing and pan installation split the difference. If you’re meticulous, you can apply a liquid membrane and carefully slope a pan. But missed spots, improper curing, or careless transitions invite silent water damage for years. Many DIYers tackle everything up to and including the substrate prep, then hire a waterproofing specialist or experienced tile setter for the critical membrane and pan work. It’s a hybrid approach that keeps costs reasonable while protecting your investment.
Use platforms like HomeAdvisor or Angi to find and vet licensed contractors in your area. Compare quotes, they’ll vary, but don’t pick the cheapest: pick the one with verifiable reviews, proper licensing, and a written contract itemizing materials and labor. A Home Renovation Markham guide or similar regional resource can also point you toward reputable local professionals.
Pull permits if your scope includes structural changes, rerouting utilities, or anything beyond cosmetic updates. Permits feel like bureaucratic drag, but they ensure inspections catch code violations and poor workmanship before they become expensive problems. Unpermitted work can tank a home appraisal and create liability headaches.
Budget for this wisely: a competent tile setter or waterproofing pro costs $50–$100+ per hour, but prevents a $5,000 water mitigation job down the road. It’s not an expense, it’s insurance.